Tyler Ferrell is the only person in the world named to Golf Digest's list of Best Young Teachers in
America AND its list of Best Golf Fitness Professionals in America.
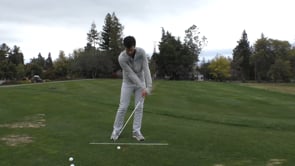
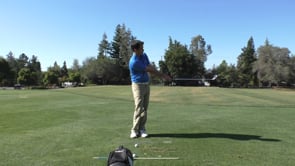
Meet your new instructor.
Subscribe now to watch the full video.
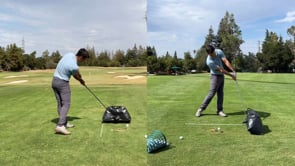
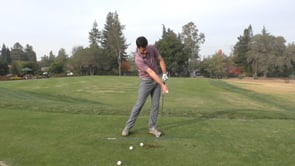
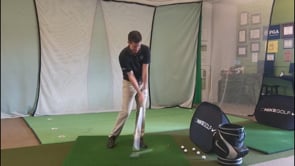
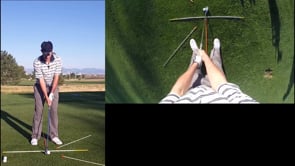
The Como Flat spot, is named after Tiger Woods' golf consultant Chris Como, and the work he has done since 2011. It is the idea that elite golfers develop a flat spot in their club arc, that helps produce more repeatable swings. This flat spot is both high to low, and in to out, In this video, you can see how our system coaches a swing that develops a good flat spot, how to visualize what in the swing makes it so, and some 3D graphs to help you see the practical goal of the concept.
Tags: Fundamentals, Not Enough Distance, Concept, Advanced, Intermediate
00:00:00,000 --> 00:00:04,000
The Struill is exploring the Komoflatsbyte.
00:00:04,000 --> 00:00:10,000
So one of the models for repeatability that I really like comes from a good friend of mine
00:00:10,000 --> 00:00:11,000
named Chris Komof.
00:00:11,000 --> 00:00:14,000
As far as I know, he's the first person to really study this.
00:00:14,000 --> 00:00:16,000
So I call it the Komoflatsbyte.
00:00:16,000 --> 00:00:21,000
But basically it's looking at the path of this clubhead through impact.
00:00:21,000 --> 00:00:27,000
And his hypothesis is that which does have some data that supports it from Enzo.
00:00:27,000 --> 00:00:32,000
And then what we can see on 3D of what the handles doing kind of validate it as well.
00:00:32,000 --> 00:00:38,000
So it seems like it's a great idea as something that relates very highly to consistency.
00:00:38,000 --> 00:00:47,000
So basically what it's talking about is if I was to just have a fixed point that this club
00:00:47,000 --> 00:00:53,000
kind of swung around like so, like if I just froze this handle in space and just swung
00:00:53,000 --> 00:00:57,000
it around that, then the path of the club would follow almost the perfect circle.
00:00:57,000 --> 00:01:00,000
You know, ignoring shaft flex and things like that.
00:01:00,000 --> 00:01:03,000
But it would follow almost the perfect circle.
00:01:03,000 --> 00:01:09,000
So if I had that perfect circle trying to contact the ground, well you would see that it would
00:01:09,000 --> 00:01:12,000
only touch the ground for a split second.
00:01:12,000 --> 00:01:19,000
So this Komoflatsbyte idea is in order to have a bigger margin of error.
00:01:19,000 --> 00:01:23,000
Instead of having the club touch the ground for just a second, I want to take this circle
00:01:23,000 --> 00:01:28,000
where the club is swinging around me and I want to kind of flatten it out down the
00:01:28,000 --> 00:01:30,000
bottom kind of like so.
00:01:30,000 --> 00:01:35,000
So it doesn't change too much of the shape of the sides, but down at the bottom it's going
00:01:35,000 --> 00:01:41,000
to get as much of a straight line as we can somewhat in the direction of the target.
00:01:41,000 --> 00:01:47,000
Well that's a neat little high level thing and we'll talk about that in greater detail
00:01:47,000 --> 00:01:48,000
in the second half of this video.
00:01:48,000 --> 00:01:53,000
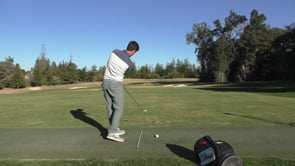
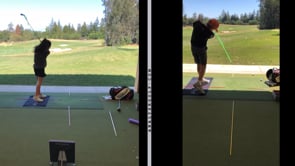
But the first part is the fun part which I call the lab, you get to go explore it.
00:01:53,000 --> 00:01:59,000
So you'll see that we have a number of drills in this in the release section and in the
00:01:59,000 --> 00:02:04,000
follow through section working on getting the club to kind of brush along the ground.
00:02:04,000 --> 00:02:10,000
So I use this concept of brushing the club on the ground to as a practical way of applying
00:02:10,000 --> 00:02:12,000
this 3D flat spot.
00:02:12,000 --> 00:02:17,000
So what you can do is you can try to experiment with different impact body positions, try
00:02:17,000 --> 00:02:22,000
to experiment with different timings and just try to get the club to brush along the
00:02:22,000 --> 00:02:24,000
ground.
00:02:24,000 --> 00:02:28,000
Now there's three ways that I want you to absolutely try this.
00:02:28,000 --> 00:02:35,000
You can add in your own but there's three ways and three things that I want you to explore.
00:02:35,000 --> 00:02:37,000
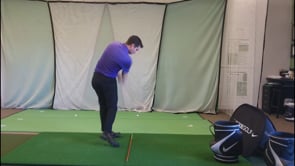
So one would be if I was too cast.
00:02:37,000 --> 00:02:41,000
So if I have my arms really straight like so, how am I going to get?
00:02:41,000 --> 00:02:47,000
Because you'll see the club barely brushes the ground unless I kind of have to have my upper
00:02:47,000 --> 00:02:53,000
body almost drag with it in order for me to figure out how to get it to brush the ground.
00:02:53,000 --> 00:02:58,000
Now you may be able to figure out a way with kind of early extension or something else
00:02:58,000 --> 00:03:03,000
in order to get it to do even better but that's one option.
00:03:03,000 --> 00:03:07,000
Option two is going to be with early extensions.
00:03:07,000 --> 00:03:13,000
So if I take my setup position and I get tall and now I'm going to, you'll see I get
00:03:13,000 --> 00:03:20,000
it to brush but you can see I'm only getting it to brush for a very small amount of space.
00:03:20,000 --> 00:03:25,000
So those are the two most common swing errors and you can see how they both make developing
00:03:25,000 --> 00:03:29,000
this 3D flats but a little bit trickier.
00:03:29,000 --> 00:03:34,000
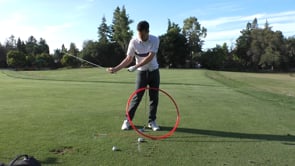
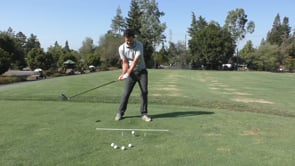
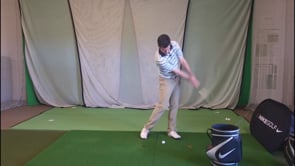
So then the third one is I'm going to do a good merry-go-round so that I have a fair amount
00:03:34,000 --> 00:03:39,000
of rotation and side bent and my arms are kind of delayed and now what I'm going to do
00:03:39,000 --> 00:03:46,000
is I'm basically going to extend those arms and you'll see that because my arms, because
00:03:46,000 --> 00:03:54,000
my body is kind of in this rotation and side bent position, when my arms extend even though
00:03:54,000 --> 00:03:58,000
when my arms extend basically that's going to help that club kind of brush along the
00:03:58,000 --> 00:03:59,000
ground.
00:03:59,000 --> 00:04:04,000
So this is part of the reason why you'll see better players having 30 degrees of rotation,
00:04:04,000 --> 00:04:11,000
30 degrees of side bend somewhere out in that range so that when you extend your arms,
00:04:11,000 --> 00:04:13,000
the club just brushes against the ground.
00:04:13,000 --> 00:04:19,000
If I had zero rotations, zero side bend and I extend my arms, here the club just slam
00:04:19,000 --> 00:04:21,000
into the ground.
00:04:21,000 --> 00:04:26,000
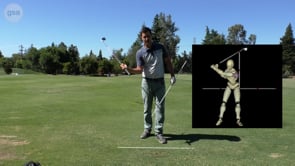
So the body position that we teach, this powering it from your whole body, all of this
00:04:26,000 --> 00:04:33,000
stuff is to help you develop this 3D flats, the coma flats, which will help you ultimately
00:04:33,000 --> 00:04:36,000
be more consistent and have a more repeatable swing.
00:04:36,000 --> 00:04:40,000
If you're a novice golfer, I recommend you turn the video off now but if you're really
00:04:40,000 --> 00:04:44,000
into the details, you're an instructor or just what I consider the golf nerds, the guys
00:04:44,000 --> 00:04:49,000
who love this study, this stuff, then I'll help you understand this 3D flats but a little
00:04:49,000 --> 00:04:50,000
bit better.
00:04:50,000 --> 00:04:52,000
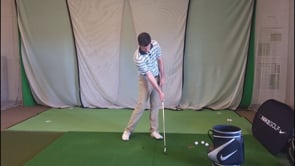
So I'm just going to bring this in.
00:04:52,000 --> 00:04:56,000
This is just going to represent the ground and hopefully it's pretty close to you know
00:04:56,000 --> 00:04:57,000
down camera line.
00:04:57,000 --> 00:05:01,000
So let's just say that that is roughly our target line and then here's the ground like
00:05:01,000 --> 00:05:02,000
so.
00:05:02,000 --> 00:05:07,000
In order for me to get and I'll do this facing you first, so in order for me to get
00:05:07,000 --> 00:05:12,000
this club to kind of slide along the ground, there's a couple different ways I could
00:05:12,000 --> 00:05:13,000
do it.
00:05:13,000 --> 00:05:18,000
One, if I keep the shaft the same and I just drag the grip across kind of like so,
00:05:18,000 --> 00:05:24,000
well that creates this club staying flat against the ground but you'll see that from
00:05:24,000 --> 00:05:30,000
practical standpoint, it wouldn't, it would be very, very difficult for me to keep this
00:05:30,000 --> 00:05:34,000
the same and drag it across like so.
00:05:34,000 --> 00:05:39,000
My body's just not set up to do that and it would be hard for me to create a lot of speed
00:05:39,000 --> 00:05:41,000
in doing that.
00:05:41,000 --> 00:05:48,000
So the second option would be I'm going to create an exaggerated amount of lean and then
00:05:48,000 --> 00:05:55,000
instead of just dragging it across, I'm going to raise it up kind of like so.
00:05:55,000 --> 00:06:02,000
So you'll see that the handle here compared to my finger is basically going to be raising
00:06:02,000 --> 00:06:09,000
up so this fixed length shaft is essentially going to be changing its pivot slightly as
00:06:09,000 --> 00:06:14,000
that club raises up which helps keep this club moving along the ground.
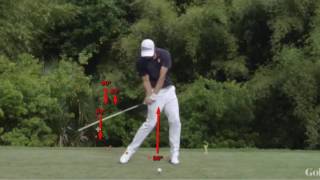
00:06:14,000 --> 00:06:25,000
So this rotation and side bend causes this phenomenon that when I extend my arms, because
00:06:25,000 --> 00:06:30,000
my upper body is slightly going back and rotating and this left shoulder is rotating
00:06:30,000 --> 00:06:36,000
away like so, you'll see that that causes the grip to actually come up and in and that
00:06:36,000 --> 00:06:43,000
coming up and in creates this flat spot of both high to low as well as into out because
00:06:43,000 --> 00:06:46,000
it's a 3D flat spot.
00:06:46,000 --> 00:06:53,000
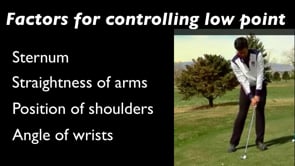
But understand that one of the other important things and ways to develop this is to make
00:06:53,000 --> 00:06:56,000
sure that your arms are extending through the shot.
00:06:56,000 --> 00:07:01,000
The more that these arms kind of bend through the shot, the more that my flat spot is
00:07:01,000 --> 00:07:05,000
going to be right along where the golf ball is as opposed to starting at the golf ball
00:07:05,000 --> 00:07:08,000
and working a ways past it.
00:07:08,000 --> 00:07:09,000
We'll go all.
00:07:09,000 --> 00:07:16,000
I'll show you a couple 3D graphs of the way that we can get our closest measurement to it,
00:07:16,000 --> 00:07:17,000
which is arc width.
00:07:17,000 --> 00:07:22,000
I'll work with this measuring the distance between the center of the grip and the
00:07:22,000 --> 00:07:25,000
center of my torso or my thorax kind of right in here.
00:07:25,000 --> 00:07:31,000
And what we'll find is that if you look at the best players in the world, they tend to have
00:07:31,000 --> 00:07:37,000
the distance between this and this increasing almost until follow through position.
00:07:37,000 --> 00:07:41,000
Some of them actually do it all the way until follow through position where many amateurs
00:07:42,000 --> 00:07:47,000
will have it pretty much it's wide as point right before impact and then decreasing.
00:07:47,000 --> 00:07:51,000
And some very high handicapers will actually have it that it's wide as point well before
00:07:51,000 --> 00:07:53,000
impact.
00:07:53,000 --> 00:07:54,000
And then increasing.
00:07:54,000 --> 00:07:57,000
So it matters how you're pulling in.
00:07:57,000 --> 00:08:01,000
The best way to do it is have this combination of rotation and side bend so that you
00:08:01,000 --> 00:08:04,000
can delay when those arms are extending.
00:08:04,000 --> 00:08:09,000
The whole purpose of that is to develop this 3D flat spot which helps with your consistency.
00:08:09,000 --> 00:08:15,000
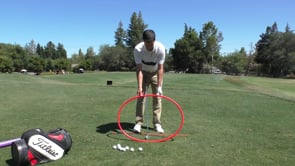
So if you're working on early extension, if you're working on casting and you just get lost,
00:08:15,000 --> 00:08:20,000
you can always come back to can I brush the ground for a long period of time starting
00:08:20,000 --> 00:08:23,000
at about where my ball position would be.
00:08:23,000 --> 00:08:27,000
If you can do that then what you're working on in your swing is going to help you be more
00:08:27,000 --> 00:08:28,000
consistent.
00:08:28,000 --> 00:08:33,000
If you can do that with a lot of speed that's everything you pretty much need to be good
00:08:33,000 --> 00:08:38,000
at golf other than controlling the club face which is that third piece.
00:08:38,000 --> 00:08:42,000
So hopefully this helps you see why we spend so much time working on the arm's shallowing
00:08:42,000 --> 00:08:44,000
during transition.
00:08:44,000 --> 00:08:48,000
And then those arms extending during the release because that combination of movements with
00:08:48,000 --> 00:08:55,000
a really good body pivot helps produce this flat spot which has been shown to be predictable
00:08:55,000 --> 00:09:03,000
for increased levels of consistency with your stock full swing.
00:09:03,000 --> 00:09:07,000
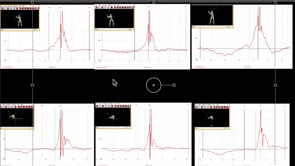
So what you see now is a sample arc width graph, a firm a tour pro.
00:09:07,000 --> 00:09:14,000
Basically the arc width graph is simply measuring the distance in inches between the thorax
00:09:14,000 --> 00:09:17,000
and the middle of the grip or the midhand's point.
00:09:17,000 --> 00:09:22,000
So what you'll see is during this timeline the arc width graph during the take away stays
00:09:22,000 --> 00:09:28,000
about the same and then the distance starts to decrease as they make the rest of their backswing.
00:09:28,000 --> 00:09:34,000
You'll see that continues to decrease through transition and then starts increasing fairly
00:09:34,000 --> 00:09:42,000
rapidly up until impact continues to increase until some point after impact usually somewhere
00:09:42,000 --> 00:09:46,000
around the follow through position because this is actually how I define the follow through
00:09:46,000 --> 00:09:47,000
position.
00:09:47,000 --> 00:09:54,000
And you'll see that that second peak is equal to or greater than where they were at address
00:09:54,000 --> 00:09:57,000
and there's a fairly rounded look to it.
00:09:57,000 --> 00:10:01,000
That's kind of the main two criteria that I'm looking for when I'm looking at one of these
00:10:01,000 --> 00:10:09,000
arc width graphs is going to be that timing of the peak at the top of the swing or transition
00:10:09,000 --> 00:10:14,000
and then the timing of the peak and the shape of the peak and the location of the peak after
00:10:14,000 --> 00:10:16,000
impact.
00:10:16,000 --> 00:10:23,000
Generally tour pro is going to have this peak be more gradual or rounded and later after
00:10:23,000 --> 00:10:28,000
impact which is kind of demonstrating that they're able to keep that club moving away from
00:10:28,000 --> 00:10:34,000
them through the impact interval which wouldn't happen without a good flat spot.
00:10:34,000 --> 00:10:38,000
So here we have a different professional and you can see that it's kind of got that similar
00:10:38,000 --> 00:10:45,000
pattern so if we look at the the peak near the top of the swing you can see that it happens
00:10:45,000 --> 00:10:50,000
after transition and then if we look at the peak after impact we can see that there's a steady
00:10:50,000 --> 00:10:54,000
increase until kind of a rounding peak after impact.
00:10:54,000 --> 00:10:58,000
So those two graphs look fairly similar but let's take a look at a couple amateur graphs
00:10:58,000 --> 00:11:02,000
and see what we'll typically see with the higher handicapper who struggle with this flat
00:11:02,000 --> 00:11:04,000
sub.
00:11:04,000 --> 00:11:11,000
So now here we have a high handicap golfer and what you'll see is the peak at the top of the
00:11:11,000 --> 00:11:16,000
swing is actually happening before the top of the swing so this is indicative of a cast
00:11:16,000 --> 00:11:23,000
pattern they're starting to kind of get that club working away from them before they transition.
00:11:24,000 --> 00:11:31,000
And then you'll see that there's a very sharp peak right at impact and that peak is significantly
00:11:31,000 --> 00:11:39,000
lower than where they were at address and then right after that peak it drops back off indicating
00:11:39,000 --> 00:11:44,000
that they're bending their arms and or chicken winging and kind of collapsing through the
00:11:44,000 --> 00:11:45,000
hitting area.
00:11:45,000 --> 00:11:51,000
Typically this is going to be part of a cast lunge pattern which is a lot less repeatable
00:11:51,000 --> 00:11:54,000
than the graph that we were demonstrating for the tour process.
00:11:54,000 --> 00:11:57,000
Let's take a look at another one.
00:11:57,000 --> 00:12:02,000
So here's kind of a medium handicap golfer you know somewhere in that 10 range but you'll
00:12:02,000 --> 00:12:07,000
see that has the similar characteristics of the higher handicap.
00:12:07,000 --> 00:12:12,000
His peak is right at the top of the swing instead of the downswing so it's not quite
00:12:12,000 --> 00:12:17,000
it's not as bad a cast but it's still slightly in that cast category and then you'll
00:12:17,000 --> 00:12:24,000
see their peak is right at it just after impact so it is widening through impact but
00:12:24,000 --> 00:12:29,000
just barely and then it kind of has a gradual decline instead of a sharp one like that
00:12:29,000 --> 00:12:34,000
higher handicap golfer that we were just demonstrating.
00:12:34,000 --> 00:12:39,000
But you will see that compared to where they are it's set up the impact peak is lower
00:12:39,000 --> 00:12:44,000
than the setup peak so they're not getting quite as much arm extension and width which
00:12:44,000 --> 00:12:48,000
will limit their flat spot and consistency.
00:12:48,000 --> 00:12:54,000
Now let's take a quick look at a before and after with a skilled golfer that I work with.
00:12:54,000 --> 00:13:00,000
So here you can see on the right is the before and basically you can see that the peak
00:13:00,000 --> 00:13:04,000
at the top of the swing was happening just before the top of the swing and then the peak
00:13:04,000 --> 00:13:10,000
at impact was fairly sharp right at impact and then there was kind of a little plateau
00:13:10,000 --> 00:13:11,000
afterward.
00:13:11,000 --> 00:13:18,000
You can see that after working on some transition and release for a season his next 3D revealed
00:13:18,000 --> 00:13:24,000
a delayed peak so now the peak is happening just into the downswing and then the peak
00:13:24,000 --> 00:13:28,000
is now happening after impact and much more gradual.
00:13:28,000 --> 00:13:33,000
This is helps him with his consistency as far as contact and ball striking and now we're
00:13:33,000 --> 00:13:35,000
shifting more into shwerking.
00:13:35,000 --> 00:13:40,000
But hopefully that understands you understand the coma flats spot how we measure it what
00:13:40,000 --> 00:13:46,000
it is and why it helps with repeatability and why it's something that you should strive
00:13:46,000 --> 00:13:47,000
for with your game.