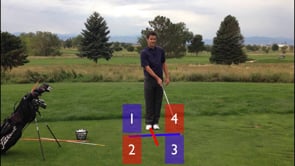
Tyler Ferrell is the only person in the world named to Golf Digest's list of Best Young Teachers in
America AND its list of Best Golf Fitness Professionals in America.
Meet your new instructor.
Subscribe now to watch the full video.
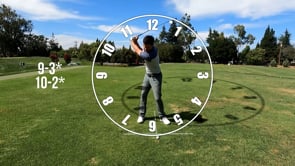
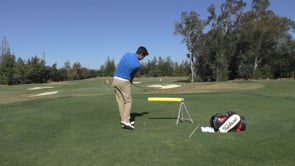
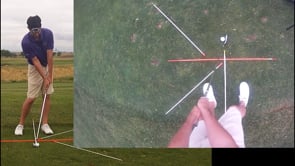
This classic drill works on the swing from waist height to waist height, or as some call it, 9 to 3. This drill works on the timing when the arms are doing the majority of the work as they transfer speed from the body to the clubhead. This drill is very versatile, and can be used to work on a lot of things around impact. The most common ways to use it is to work on the amount of rotation/side bend of the body, the direction and timing of the arm motions, and the adjustments the wrists have to make to square the club face.
Some of the most common problems that show up in this drill are standing up and early straightening of the trail arm to help square the face or not having enough rotation and side bend to delay the straightening of the trail arm. These two often go hand in hand, but the 9-3 drill is a smaller version of the full swing, which gives you the opportunity to practice the release and impact and get a general sense of the proper body positions that you will want to use in your full golf swing.
Playlists: Train Your Release, Fix Your Flip, Beginner Program
Tags: Poor Contact, Follow Through, Drill, Intermediate, Beginner
00:00:00,000 --> 00:00:04,000
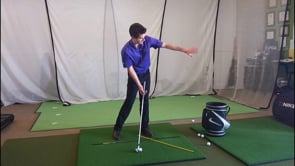
This is the 9-3 or waste of waste drill.
00:00:04,000 --> 00:00:08,000
I know you're excited because so far we've been just going over some of the mundane things
00:00:08,000 --> 00:00:13,000
of getting into setup, getting into impact position, getting into follow-through position.
00:00:13,000 --> 00:00:15,000
Now we're going to start moving.
00:00:15,000 --> 00:00:18,000
You're actually going to strike a golf ball.
00:00:18,000 --> 00:00:25,000
I want you to keep in mind what you've been training with the impact position and what you've learned about the follow-through position.
00:00:25,000 --> 00:00:30,000
Because you're basically now going to try to figure out how to move through those two positions.
00:00:30,000 --> 00:00:31,000
Okay?
00:00:31,000 --> 00:00:41,000
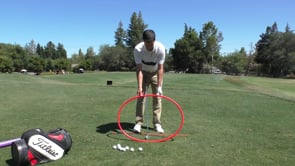
So reminder about the impact position, you're going to have your weight all the way onto your left heel, hips are open, your right elbow is somewhat close to your side.
00:00:41,000 --> 00:00:45,000
Your left wrist is pretty flat and your right wrist has a cup to it.
00:00:45,000 --> 00:00:48,000
Just like so, there's a little bit of side tilt.
00:00:48,000 --> 00:00:52,000
Now as you go to that follow-through position, that side tilt continues.
00:00:52,000 --> 00:00:57,000
Those arms are fully extended now when the club is about parallel to the ground here.
00:00:57,000 --> 00:01:00,000
And your hands are pointed somewhat behind you.
00:01:00,000 --> 00:01:01,000
Okay?
00:01:01,000 --> 00:01:09,000
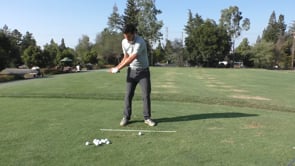
So now what we're going to do is we're going to take a backswing to the club parallel to the ground or about waste height,
00:01:09,000 --> 00:01:13,000
or what my first instructor referred to as 9 o'clock.
00:01:13,000 --> 00:01:17,000
So if you imagine a clock, we're going to go from 9 o'clock to 3 o'clock.
00:01:17,000 --> 00:01:23,000
So, again, keep in mind those impact and follow-through positions.
00:01:23,000 --> 00:01:28,000
And then you're going to practice going from waste height to waste height.
00:01:28,000 --> 00:01:32,000
And this is really helping you feel where the club will extend out to.
00:01:32,000 --> 00:01:38,000
The only reason that the club goes all the way up here when you do a follow-through is because you add more speed.
00:01:38,000 --> 00:01:41,000
It's not that you're manipulating and raising the club.
00:01:41,000 --> 00:01:47,000
The club is working out away from your body as your body or stalls it and causes it to move up.
00:01:47,000 --> 00:01:50,000
So now I'm going to demonstrate a couple of these 9 to 3 things.
00:01:50,000 --> 00:01:56,000
And really for example purposes, remember your swing is going to look slightly different because your body is slightly different.
00:01:56,000 --> 00:01:58,000
You've got little tendencies.
00:01:58,000 --> 00:02:03,000
But the big picture is trying to get into that good impact position and trying to get into that good follow-through position.
00:02:03,000 --> 00:02:06,000
So the 9 to 3 drill.
00:02:11,000 --> 00:02:18,000
That was about a B plus.
00:02:18,000 --> 00:02:28,000
There's the A.
00:02:28,000 --> 00:02:33,000
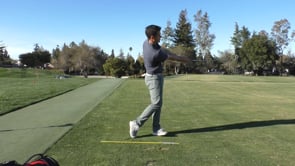
Okay, so the 9 to 3 drill again swinging from waste height to waste height.
00:02:33,000 --> 00:02:39,000
The biggest problem that I typically see on this is because it's a short swing compared to the full swing.
00:02:39,000 --> 00:02:42,000
You're not going to have a lot of time to shift your weight onto the left side.
00:02:42,000 --> 00:02:49,000
When you're practicing this, one of the common issues that I see is that because it's a short swing,
00:02:49,000 --> 00:02:52,000
you're not going to have a lot of time to shift your weight into that left heel.
00:02:52,000 --> 00:03:01,000
So you almost want to pre-set more to the left and you'll just have a little weight shift into that left side before you go to the follow-through position.
00:03:01,000 --> 00:03:06,000
So just be aware of getting into that left heel kind of as quickly as you can.